Overview
The X-AnyLabeling Visual Question Answering (VQA) tool annotates multimodal image-question answering datasets. It supports image-based question-and-answer pairs, configurable input components, and AI assistance for preparing structured data for supervised fine-tuning, reinforcement-learning post-training, and similar tasks.
Launching the Tool
To open the VQA tool, ensure that the main window’s image directory is loaded. Then, either click the VQA icon in the left toolbar of the main window or use the following keyboard shortcut:
- Windows/Linux:
Ctrl+2 - macOS:
⌘+2
On startup, the system automatically loads the default configuration from the following path. You may modify it as needed:
~/xanylabeling_data/vqa/components.json
Tutorial
The VQA tool adopts a dual-panel layout: the left panel displays image previews, while the right one provides annotation controls.
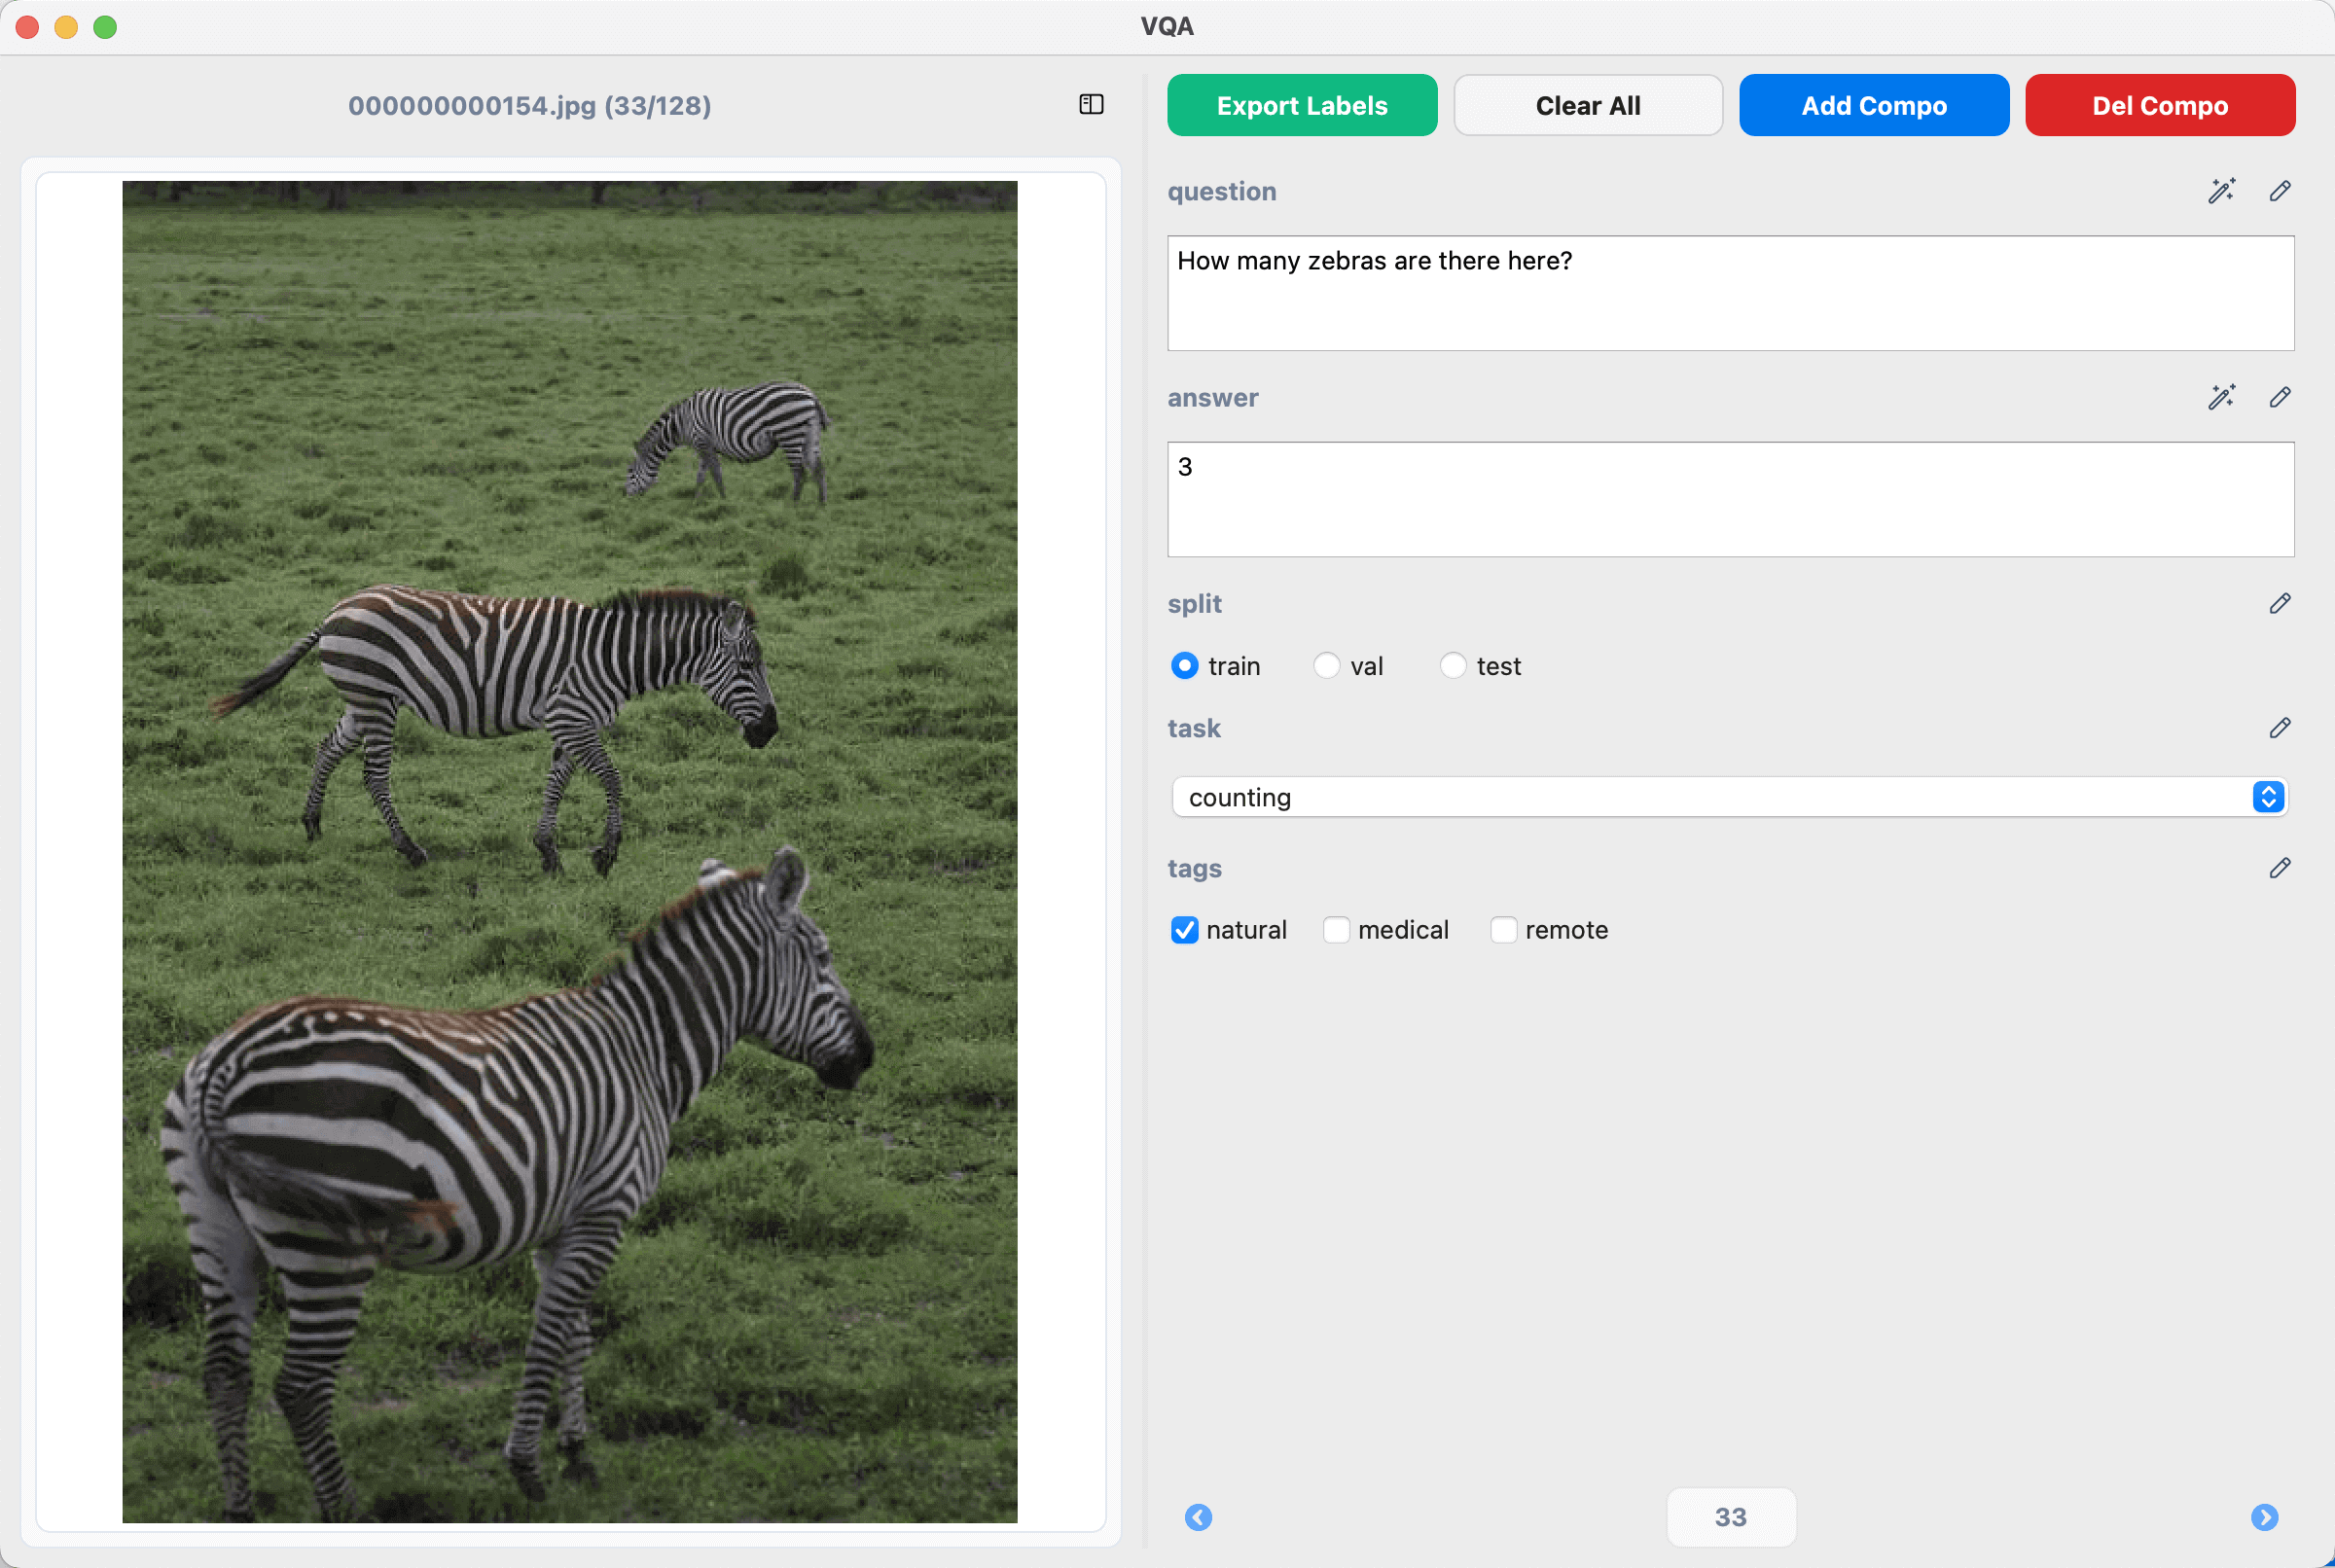
Left Panel – Image Preview
- Filename and Progress Indicator: Shows the current image filename and its position within the dataset (e.g.,
000000000154.jpg (33/128)). - Image Preview Area: Displays the image centered on the panel with adaptive zoom.
- Panel Toggle: Use the sidebar icon to expand or collapse the left panel.
Right Panel – Annotation Controls
- Toolbar Buttons:
| Button | Description |
|---|---|
| Export Labels | Export annotations as JSONL format |
| Clear All | Remove all annotations for the current image |
| Add Component | Add a new annotation component |
| Del Component | Delete an existing component |
- Annotation Components:
| Component | Type | Description |
|---|---|---|
| Text Input | QLineEdit | For open-ended QA, such as image descriptions or detailed answers |
| Radio Buttons | QRadioButton | For single-choice tasks, such as task type selection or dataset split |
| Checkboxes | QCheckBox | For multi-choice tasks, such as image tagging or attribute labeling |
| Dropdown Menu | QComboBox | For single-choice tasks with many options, supports custom lists |
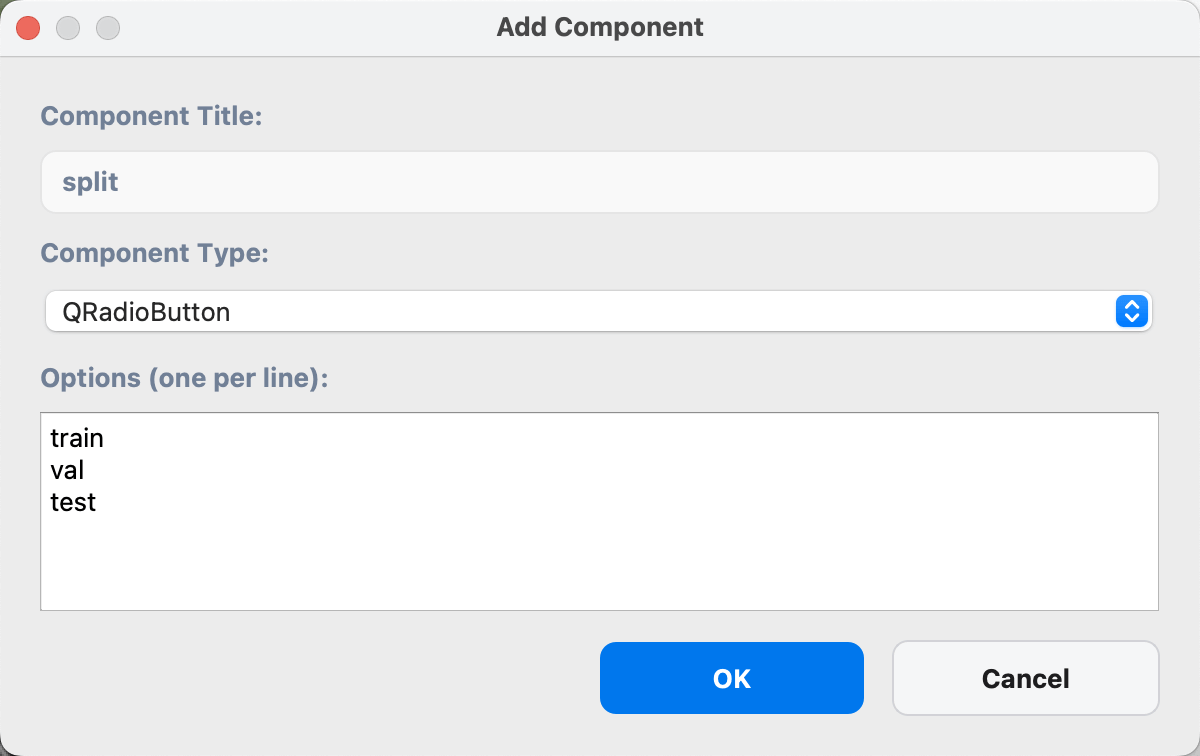
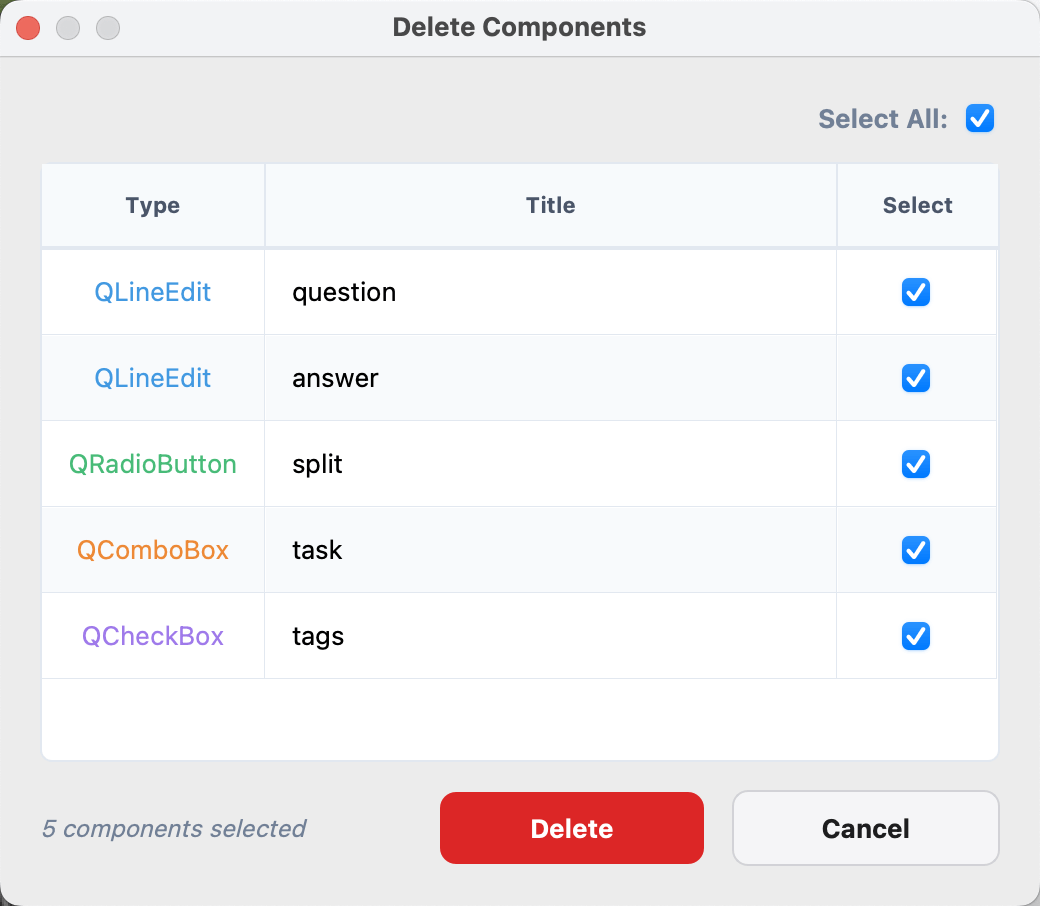
Text input components support AI-assisted annotation. Before using this feature, follow the configuration instructions in the Chatbot guide.
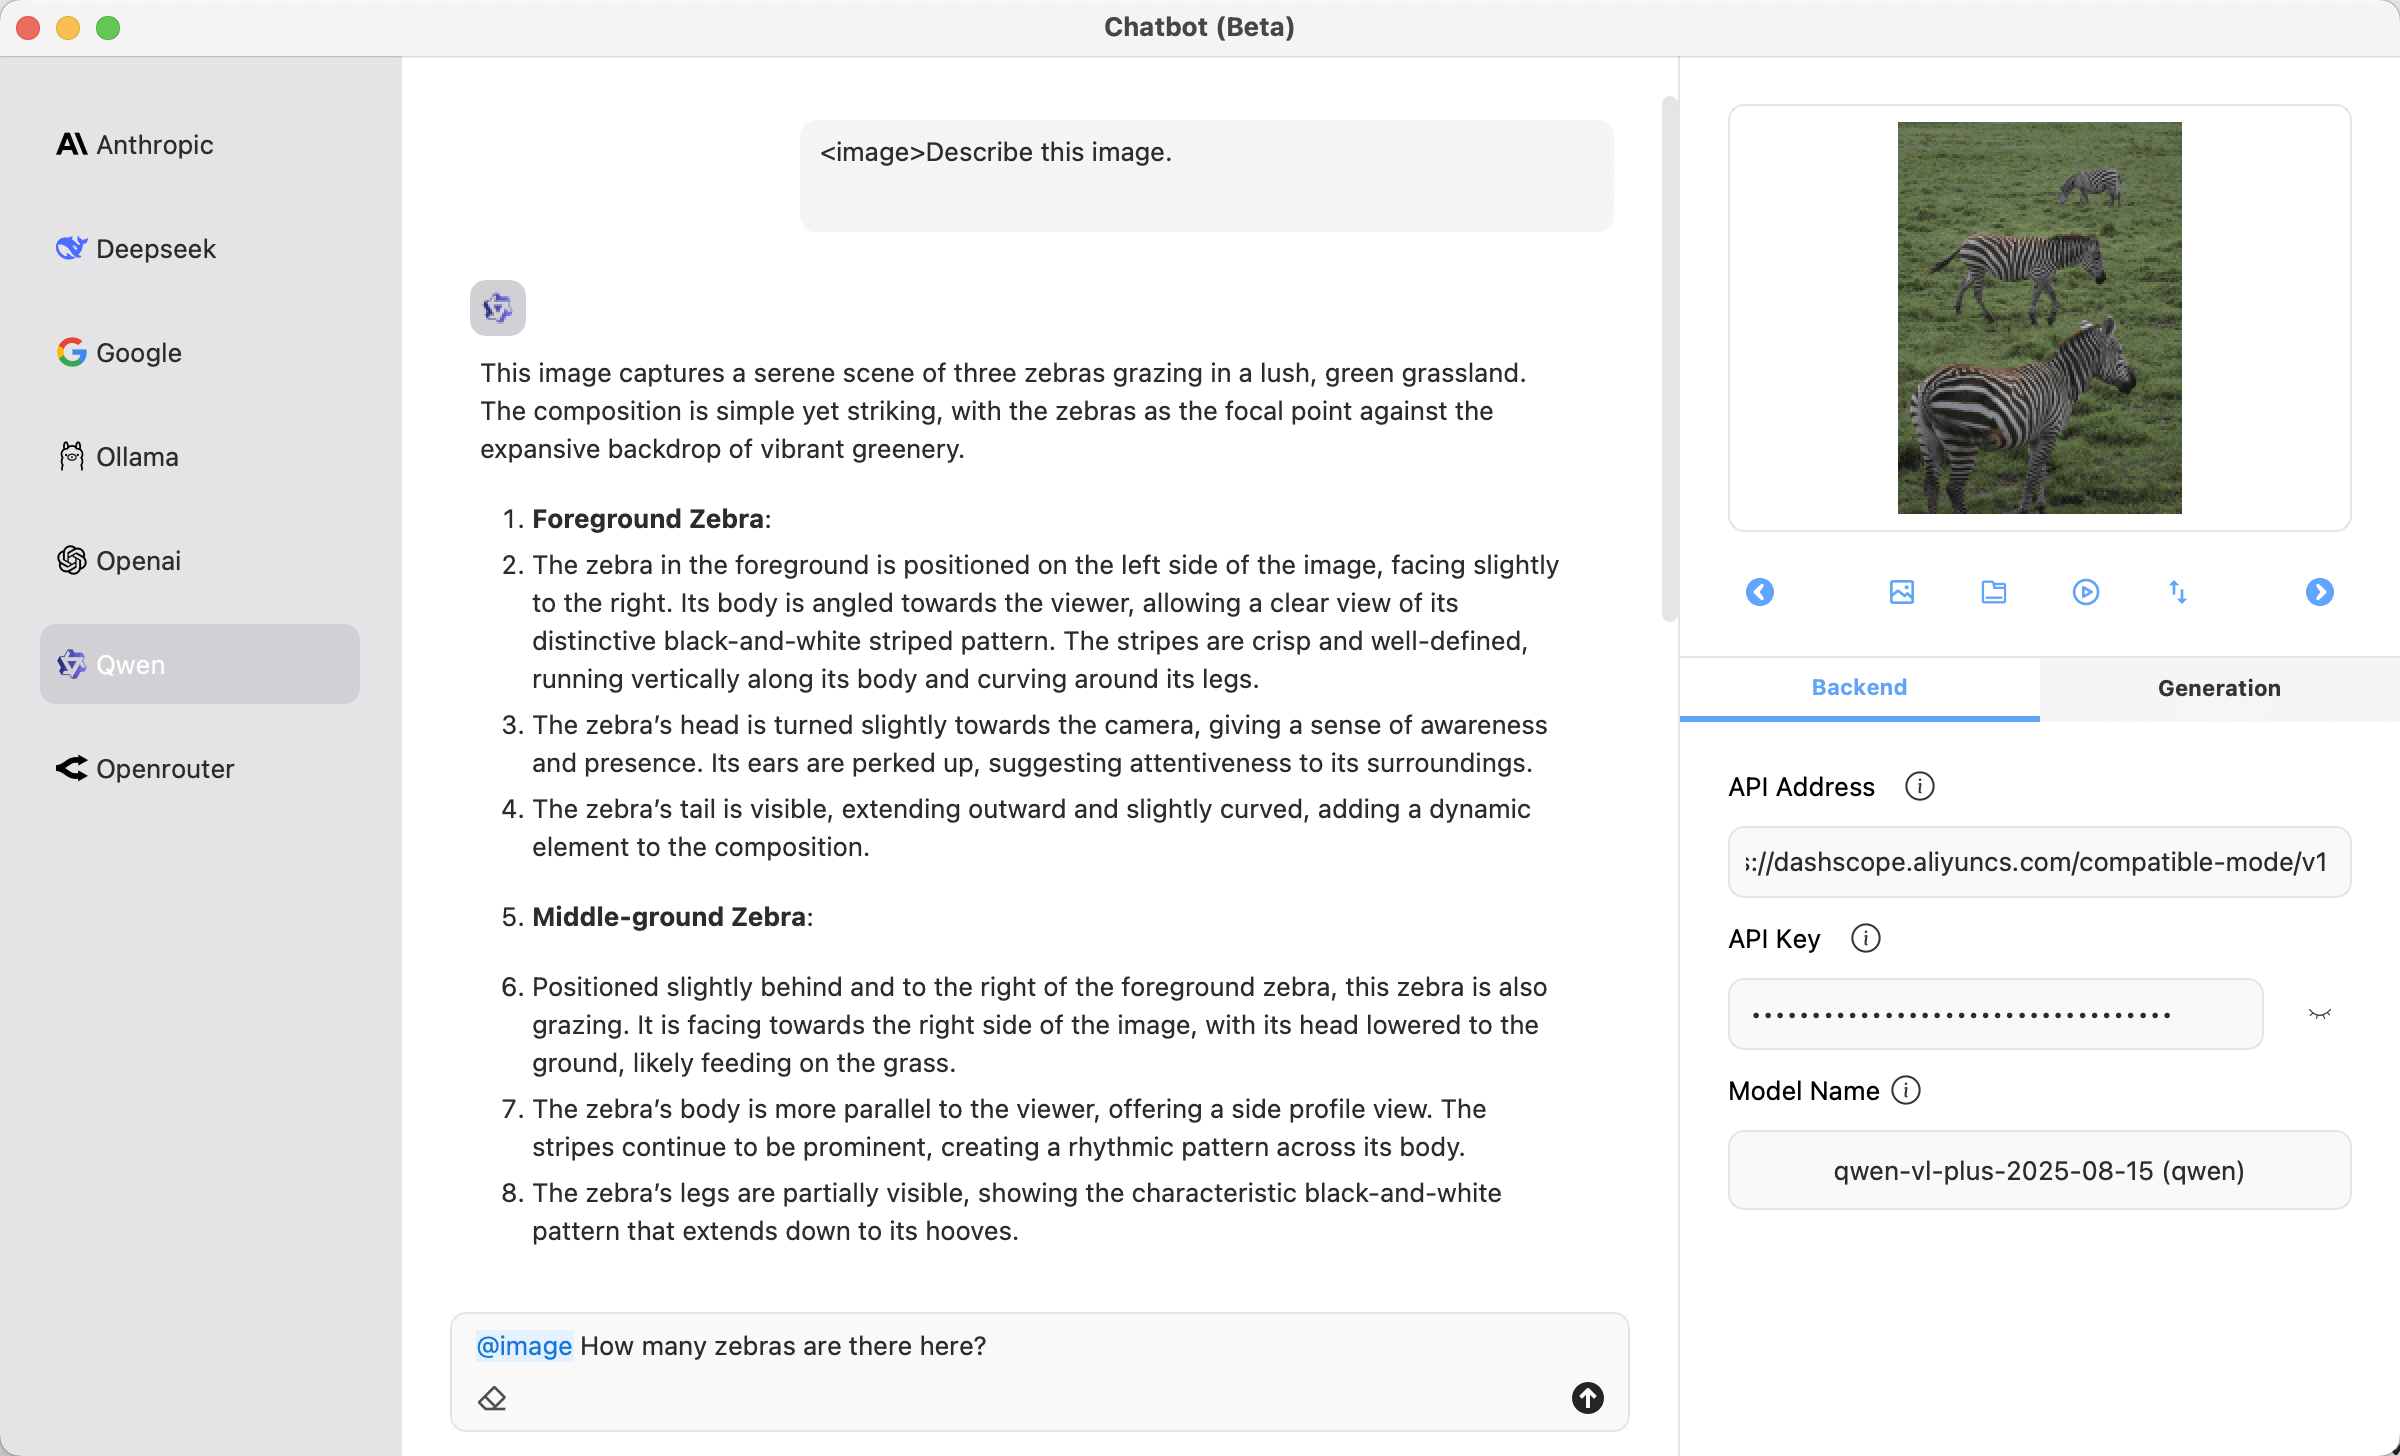
Once configured, you can open the AI assistant dialog by clicking the magic wand (🪄) icon in the title bar.
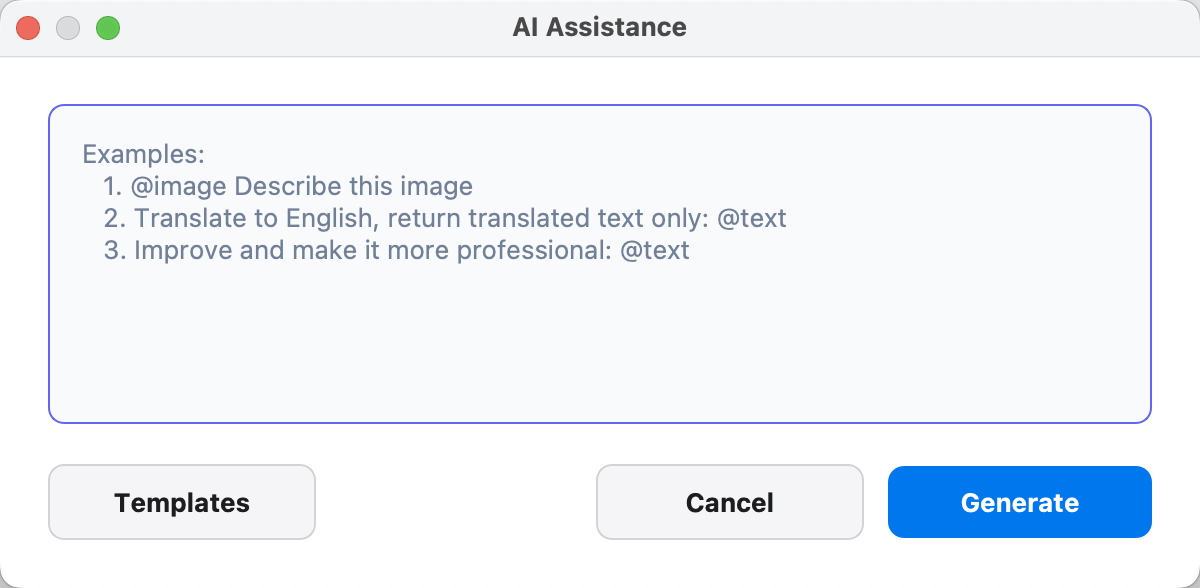
The system supports both text-only and multimodal prompts with various reference tokens:
Basic References
@image: References the current image for AI analysis@text: References the current text input field content
Cross-Widget References
@widget.component_name: References other QLineEdit component values, e.g.,@widget.questionreferences the "question" component
Label Data References
@label.shapes: References all annotation shapes in the current image@label.imagePath: References the image file path@label.imageHeight: References the image height@label.imageWidth: References the image width@label.flags: References annotation flags
Usage Examples
Describe objects in the image: @image
Analyze with existing annotations: @image Analyze based on shapes @label.shapes
Reference other components: Generate answer based on question "@widget.question"
To further enhance efficiency and reusability, the tool includes a prompt template gallery. Predefined templates are available for common use cases, and users can freely add, edit, or delete custom templates. Templates help build high-quality prompts quickly, improving annotation speed and consistency.
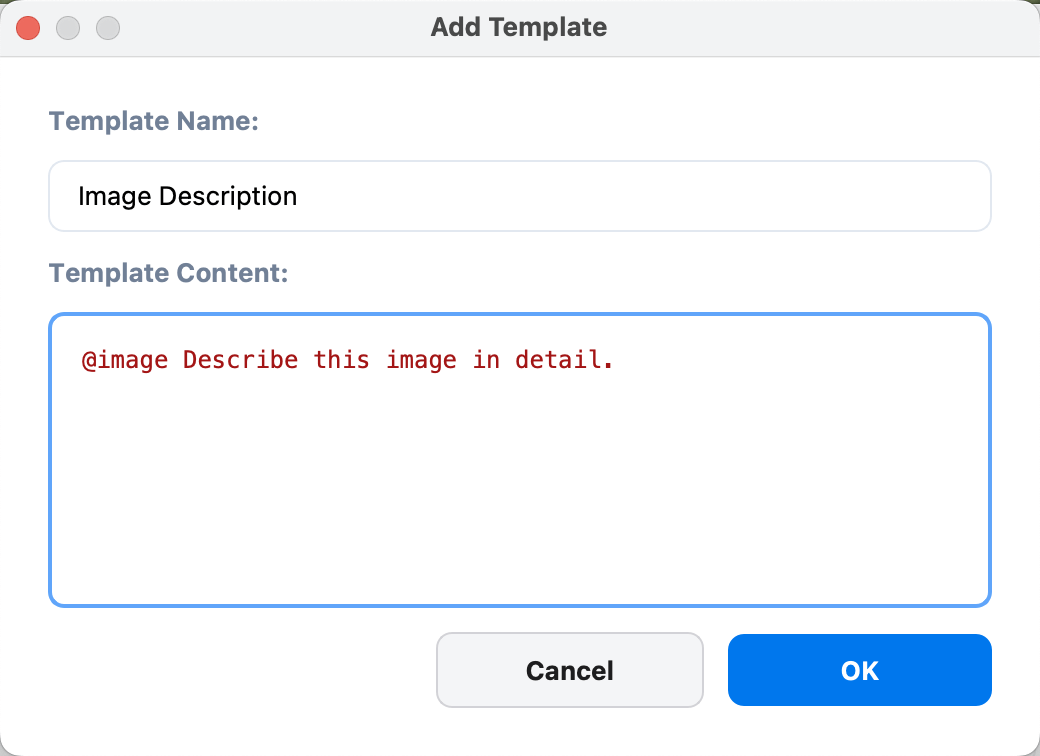
Hovering over a template displays the full content in a tooltip for quick preview. For custom templates, double-clicking a template field allows you to edit the title and content.
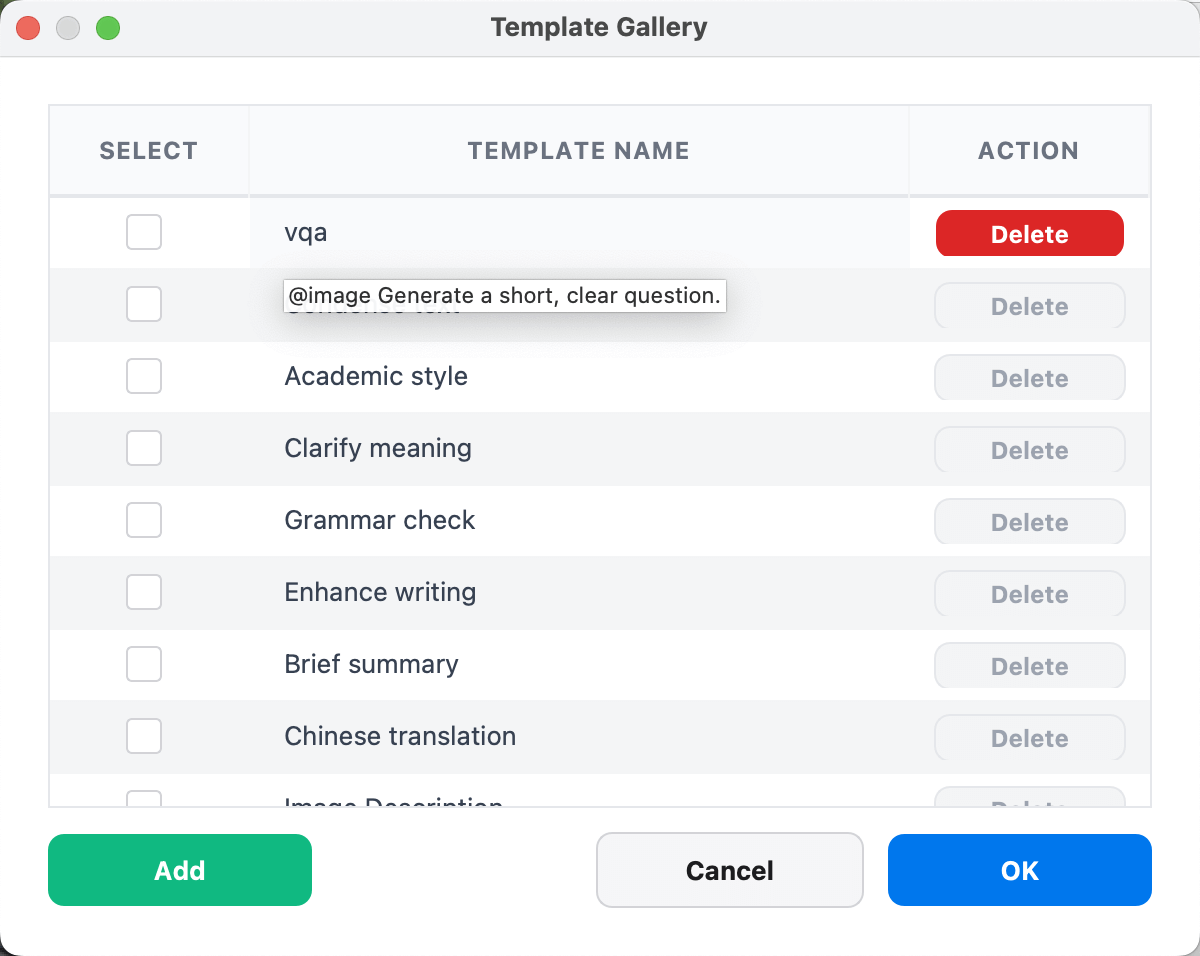
Data Management
X-AnyLabeling uses an autosave mechanism to ensure that no annotation work is lost. Annotations are automatically saved in JSON format in the same directory as the corresponding image. For VQA tasks, all annotation data is stored under the vqaData field. This field contains structured data collected through the configured components:
{
  "version": "${version}",
  "flags": {},
  "shapes": [],
  ...
  "vqaData": {
    "question": "How many zebras are there here?",
    "answer": 3,
    "split": "train",
    "task": "Counting",
    "tags": [
      "natural"
    ]
  },
  "imagePath": "0000000000154.jpg",
  "imageHeight": 640,
  "imageWidth": 480
}
After completing annotation tasks, click the Export Labels button to export the data. The export dialog provides flexible field selection, including:
- Basic Fields: Image filename, width, and height
- Custom Component Fields: All configured components and their corresponding data
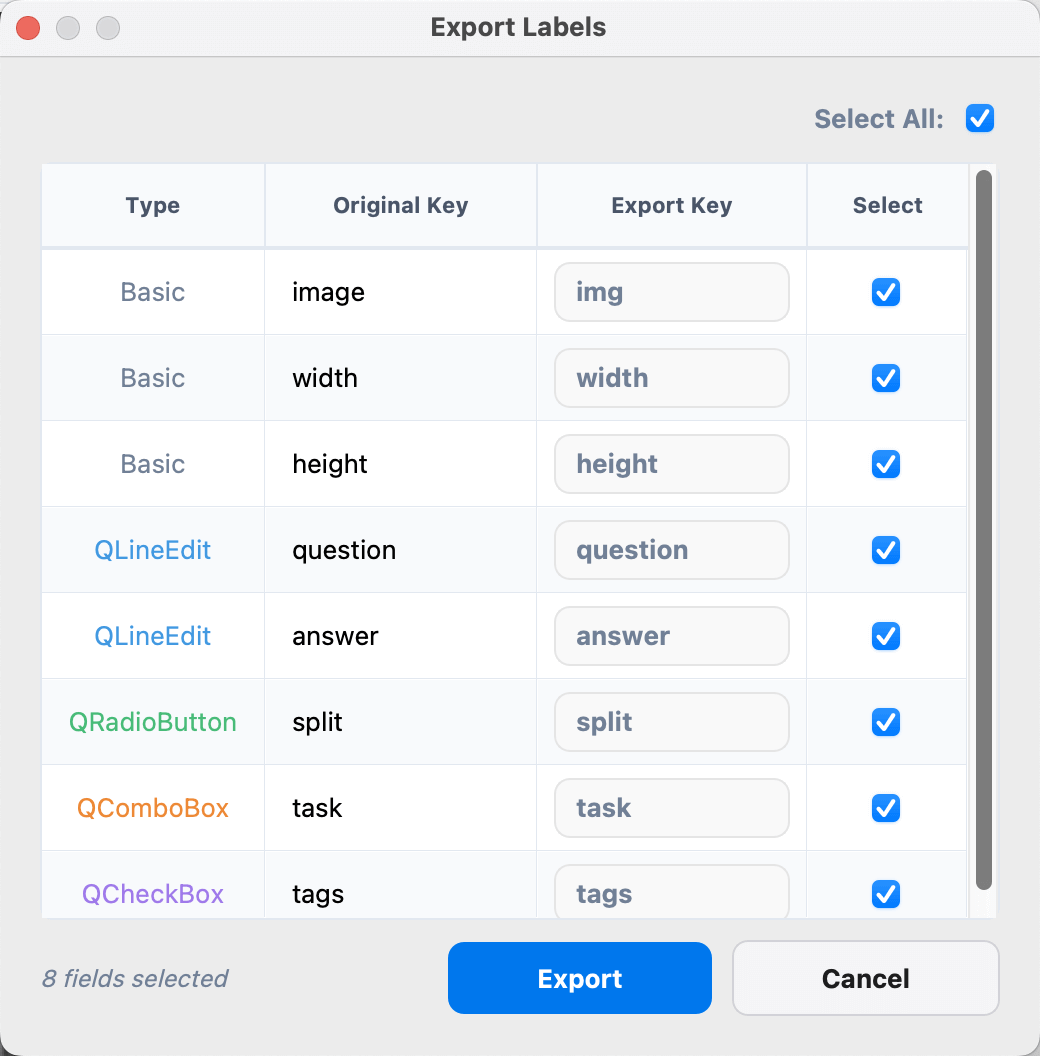
Exported data is saved in JSONL format, with one record per line. Example output:
{"image": "0000000000154.jpg", "width": 640, "height": 480, "question": "How many zebras are in the image?", "answer": 3, "split": "train"}
{"image": "0000000000155.jpg", "width": 640, "height": 480, "question": "What is the cat doing?", "answer": "sleeping", "split": "val"}